Windows Terminal Configuration Tips for Improved Workflow
Tools/ (Posted on )
When I first tried Windows Terminal, it didn’t seem like something I would use. I had used Terminator as my go to terminal for a few years while doing web development using various Linux distributions, but I really wanted to give Windows a shot and use it instead. I tried some terminal emulators, but was left unimpressed. Since I stumbled upon WSL2 (Windows Subsystem for Linux), I gave Windows Terminal another shot and figured to explore its settings. After tweaking the configuration, I finally felt productive while working on Windows.
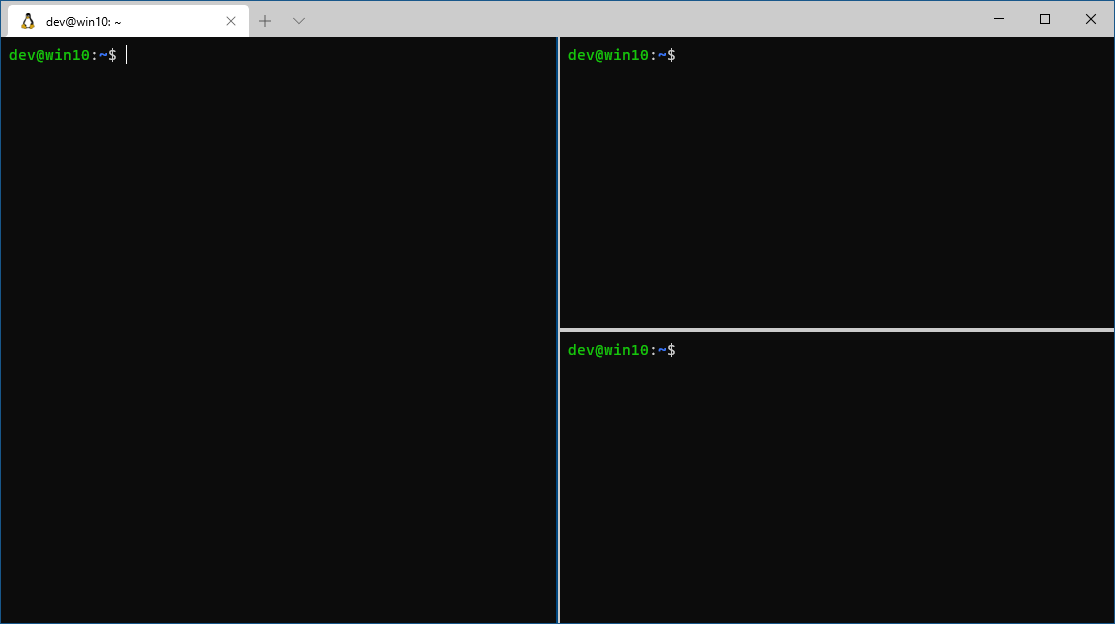
Windows Terminal comes with a bunch of useful features. You can open multiple terminal instances in separate tabs at the same time, you can split the current window in multiple panes and control their size.
Accessing the Settings
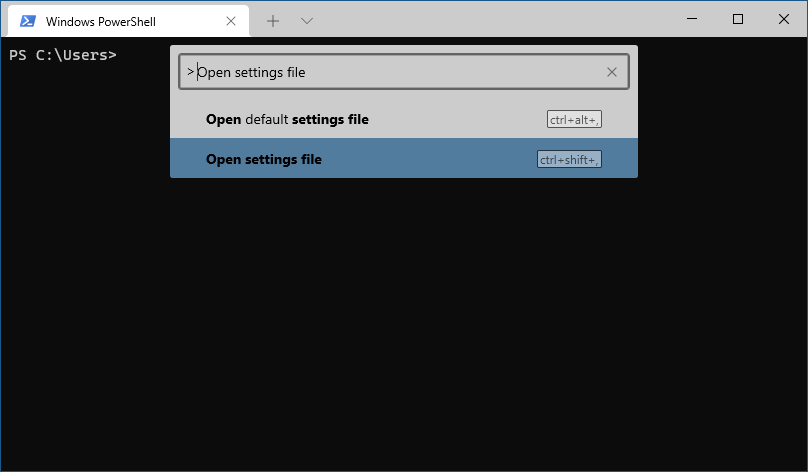
To access the settings file press the shortcut button combination Ctrl + Shift + ,, or run the Open settings file command from the command palette, which can be accessed by pressing Ctrl + Shift + p.
These are your personal settings that you can freely customize. You can find the file that contains your settings in C:\Users\{USERNAME}\AppData\Local\Packages\Microsoft.WindowsTerminal_8wekyb3d8bbwe\LocalState, if you want to back it up or open with a text editor of your choice. You can also delete the file if you messed something up, Windows Terminal will revert back to the original settings and create a new settings.json file the next time it starts up.
This settings file does not contain all the settings, Windows Terminal uses a default settings file for that. Any setting that you place in settings.json file overrides the default setting accordingly.
You can explore the default settings to learn about the available configuration options. To access the default settings, open the drop-down menu as done previously, but this time hold down the Alt key while pressing Settings. You can also use the Ctrl + Alt + , shortcut or Open default settings file command in the command palette.
Changing Default Shell
By default Windows Terminal opens PowerShell, but I want to use Ubuntu via WSL2 while doing development work, therefore I changed that Windows Terminal starts with Ubuntu’s shell open. Let me explain how to do it in the following steps.
-
Open the Settings and find the
listunderprofiles. -
Copy the
guidof the profile of your choice. In my case, itsnameis Ubuntu and theguidlooks something like this2d5de392-38a7-62cf-b941-4309b257f312. -
Find the
defaultProfileat the top of the settings file and replace its value within the curly brackets with theguidyou just copied."defaultProfile": "{2c4de342-38b7-51cf-b940-2309a097f518}"
Adjusting Shortcut Keys
Custom key bindings was the game changer for me, since I was already used to certain key combinations performing certain actions in the past that are also available in Windows Terminal. To customize the key bindings, it is useful to have the default settings open to see what can be changed. Then, locate the actions array in the defaults.json file and copy the commands whose shortcuts you want to change into the actions array inside of your settings.json file. After that, it’s just a matter of specifying which keys trigger the actions.
Some things that I adjusted include closing the program and opening the find form.
{ "command": "closeWindow", "keys": "ctrl+q" },
{ "command": "find", "keys": "ctrl+f" }
I also changed how I can manage the panes to easily split my current window into multiple parts or close them.
{ "command": "closePane", "keys": "ctrl+w" },
{ "command": { "action": "splitPane", "split": "horizontal", "splitMode": "duplicate" }, "keys": "ctrl+h" },
{ "command": { "action": "splitPane", "split": "vertical", "splitMode": "duplicate" }, "keys": "ctrl+g" },
{ "command": { "action": "splitPane", "split": "auto", "splitMode": "duplicate" }, "keys": "ctrl+d" }
It doesn’t have to stop here, there are more useful actions, but at this point you know how to adjust them to your liking on your own.
Customizing Theme
Staring at the same old white text on black background all day might not be your cup of tea. Luckily, the looks of the terminal can be changed in a few steps.
-
Find a Windows Terminal theme that you like. For this, I used the https://windowsterminalthemes.dev/ website. You can copy a theme from there, which should give you an object with multiple properties that contain colors.
-
Paste the theme configuration inside the
schemesarray."schemes": [ { "name": "BlulocoDark", "black": "#4a505d", "red": "#f81141", "green": "#23974a", "yellow": "#fd7e57", "blue": "#285bff", "purple": "#8c62fd", "cyan": "#366f9a", "white": "#ccd5e5", "brightBlack": "#61697a", "brightRed": "#fc4a6d", "brightGreen": "#37bd58", "brightYellow": "#f6be48", "brightBlue": "#199ffd", "brightPurple": "#fc58f6", "brightCyan": "#50acae", "brightWhite": "#ffffff", "background": "#1e2127", "foreground": "#abb2bf", "selectionBackground": "#2f3441", "cursorColor": "#fec309" } ] -
Now, you can use this theme for all shells by setting the
colorSchemeto thenameof your chosen theme inside thedefaultsobject, which is underprofilesobject."profiles": { "defaults": { "colorScheme": "BlulocoDark" } }Or, use the theme only for a certain shell by placing the
colorSchemeinto a specific profile located in one of thelistobjects inside theprofilesobject. This way each shell can have its own different theme."profiles": { "list": [ { "guid": "{2c4de342-38b7-51cf-b940-2309a097f518}", "hidden": false, "name": "Ubuntu", "source": "Windows.Terminal.Wsl", "colorScheme": "BlulocoDark" } ] }
Pro Tips
By default, when I open Ubuntu’s shell in Windows Terminal, the working directory is set to /mnt/c/Users/{USERNAME}. This is not very useful in my case, because all my projects are located under my home directory in ~/Projects folder inside Ubuntu. Instead of changing the directory every time I open the shell, the starting directory can be adjusted to open my user’s home directory by changing the startingDirectory property to contain \\\\wsl$\\{DISTRO NAME}\\home\\{USERNAME}. For me, the name of distribution is Ubuntu and my user name inside of it is dev.
{
  "guid": "{2c4de342-38b7-51cf-b940-2309a097f518}",
  "hidden": false,
  "name": "Ubuntu",
  "source": "Windows.Terminal.Wsl",
  "colorScheme": "BlulocoDark",
  "startingDirectory": "\\\\wsl$\\Ubuntu\\home\\dev"
}
You can reorder the profiles that appear in the new tab drop-down menu or even hide the ones that you don’t intend to use. They will appear in the drop-down menu in the order that they are specified inside the list array.
"list": [
  {
    "guid": "{2c4de342-38b7-51cf-b940-2309a097f518}",
    "hidden": false,
    "name": "Ubuntu",
    "source": "Windows.Terminal.Wsl",
    "startingDirectory": "\\\\wsl$\\Ubuntu\\home\\dev",
    "colorScheme": "BlulocoDark"
  },
  {
    "guid": "{61c54bbd-c2c6-5271-96e7-009a87ff44bf}",
    "name": "Windows PowerShell",
    "commandline": "powershell.exe",
    "hidden": false
  },
  {
    "guid": "{0caa0dad-35be-5f56-a8ff-afceeeaa6101}",
    "name": "Command Prompt",
    "commandline": "cmd.exe",
    "hidden": true
  },
  {
    "guid": "{b453ae62-4e3d-5e58-b989-0a998ec441b8}",
    "hidden": true,
    "name": "Azure Cloud Shell",
    "source": "Windows.Terminal.Azure"
  }
]
Currently, when splitting a window into multiple panes, the newly created pane sets its working directory to the one specified in startingDirectory. In my case, it is not the desired behavior. I would like the newly created pane to have the same working directory as the pane from which it split off. At the moment, there is no official support for this functionality, but there is a discussion about it in a GitHub issue. I adjusted my ~/.bash_profile to contain the line shown below and now newly created panes have their working directories match the directory of the pane from which the split command was executed.
export PROMPT_COMMAND='printf "\e]9;9;%s\e\\" "$(wslpath -m "$PWD")"'